
Use conditionals in templatesUpdated 3 days ago
Conditionals in Blueprint
Conditionals let you control when steps, product options, and option values appear based on what a customer has already selected.
In Blueprint, you create conditionals at the template level first, then apply them inside the Product Options screen. This is useful when you only want to show follow-up choices after a specific answer, such as showing extra fields when a checkbox is selected or revealing certain dropdown values only after an earlier choice.
INFO
Conditionals can be applied to a whole product option or to individual option values on supported option types.
Create a conditional
1. Open the template - In the Blueprint app, go to Templates and open the template you want to update. If your template uses steps, conditionals can help control which later choices appear as the customer moves through the flow.
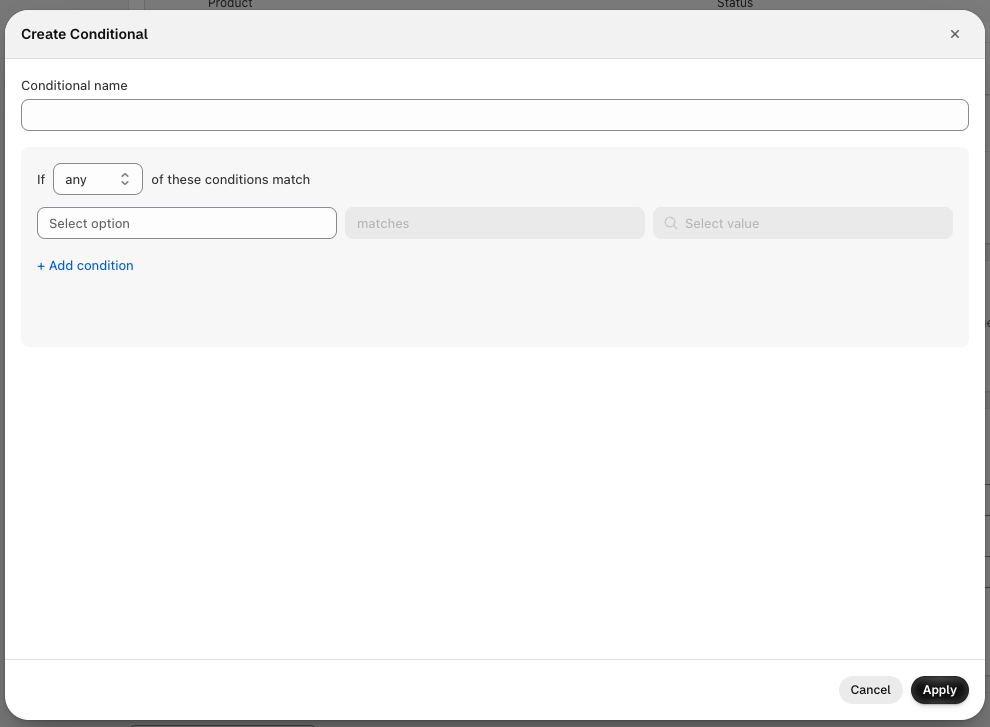
2. Find the conditionals section - Scroll through the template until you reach Conditionals (optional), then click Create Conditional.

3. Name the conditional - Enter a clear Conditional name so it is easy to recognise later when applying it to options or values. Use names that describe the rule, such as Show gift message when gift wrap is checked or Show leather care options when Leather is selected.
4. Set the conditions - Choose whether any or all conditions should match. Then select the option and value you want Blueprint to check. You can click + Add condition to add more rules. The choices available here depend on the options already added to the template and the Option type used. For example, if the source option is a checkbox, the value may be checked or unchecked.

5. Apply the conditional - When the rule is complete, click Apply. The conditional is now saved on the template and ready to be assigned to product options or option values.
Apply a conditional to a product option
1. Go to product options - Within the same template, scroll to Product Options. Click Add another option to create a new option, or open an existing option to edit it.
2. Open the option editor - In the Edit Product Option panel, find the Conditional (optional) section. Turn on Add conditional to the option, then choose one of the conditionals you created for the template.
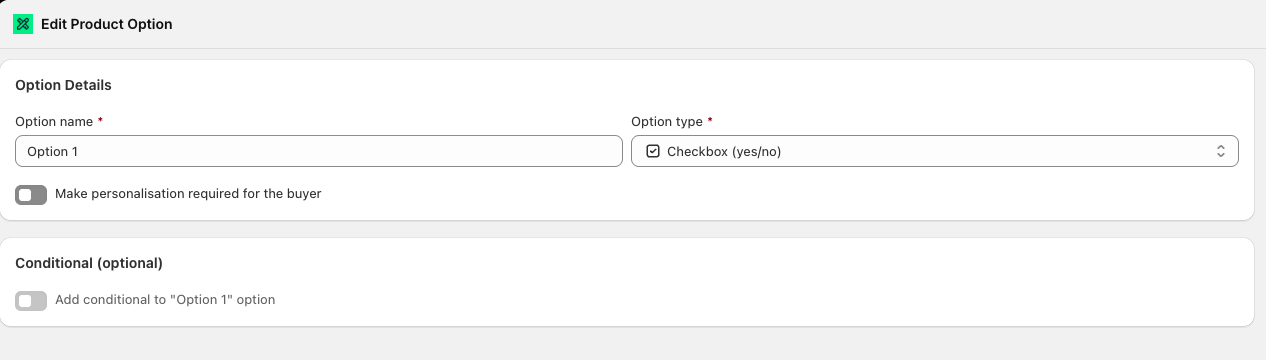
3. Save the option - Click Save in the option editor. The conditional will not go live on the storefront until the option change is saved.
Apply a conditional to an option value
Some option types also let you apply a conditional to a specific value instead of the whole option.
1. Open the value settings - Edit the option, then go to Option Values. Find the value you want to control and expand Advanced options.
2. Add conditional to the value - Use the setting labelled Add conditional to this option value and select the conditional you want to use.
3. Save the option - Click Save so the conditional is applied to that value on the storefront.
WARNING
The conditional setting may be greyed out on the first option or first value in a flow. This is expected when there is nothing earlier in the template for Blueprint to evaluate.
How conditionals behave
Conditionals are created once at template level and then reused where needed.
They rely on earlier customer selections, so the order of your options matters.
You can use them to reveal later choices, hide irrelevant options, or narrow down values inside an option.
The available condition values depend on the source option type. For example, checkboxes can use states like checked and unchecked.
Best practices
Create the options in your template before building conditionals, so the correct choices appear in the conditional builder.
Use clear conditional names so they are easy to select later in the option editor.
Apply conditionals to the whole option when the entire field should appear or disappear.
Apply conditionals to individual values when the option should stay visible but only certain values should be shown.
Test the template on the storefront after saving to confirm the customer journey appears in the right order.
TIP
If you are building a longer guided journey, combine conditionals with Show options one step at a time so customers only see the next relevant choice.
Common questions
Q. Why can't I apply a conditional to the first option?
A. Blueprint can only evaluate a conditional against something that comes earlier in the template. If an option or value appears first, there is nothing before it to check, so the conditional control may be unavailable.
Q. Why can't I see the value I want in the conditional builder?
A. The value list is based on the options already added to the template and the Option type used for those options. If the expected option or value is missing, check that it already exists in the template and has been configured correctly.
Q. Do I need to save after applying a conditional?
A. Yes. After adding a conditional to a product option or option value, click Save in the option editor. The rule will not appear on the storefront until that option has been saved.